Access a web application via its private hostname without WARP
With Cloudflare Browser Isolation and resolver policies, users can connect to private web-based applications via their private hostnames without needing to install the WARP client. By the end of this tutorial, users who pass your Gateway DNS and network policies will be able to access your private application at https://<your-team-name>.cloudflareaccess.com/browser/https://internalrecord.com.
Before you begin
Section titled “Before you begin”Make sure you have:
- Cloudflare Browser Isolation enabled on your account
- Resolver policies enabled on your account
- An HTTP or HTTPS application that users access through a browser
Create a Cloudflare Tunnel
Section titled “Create a Cloudflare Tunnel”First, install cloudflared on a server in your private network:
-
Log in to Zero Trust ↗ and go to Networks > Tunnels.
-
Select Create a tunnel.
-
Choose Cloudflared for the connector type and select Next.
-
Enter a name for your tunnel. We suggest choosing a name that reflects the type of resources you want to connect through this tunnel (for example,
enterprise-VPC-01). -
Select Save tunnel.
-
Next, you will need to install
cloudflaredand run it. To do so, check that the environment under Choose an environment reflects the operating system on your machine, then copy the command in the box below and paste it into a terminal window. Run the command. -
Once the command has finished running, your connector will appear in Zero Trust.
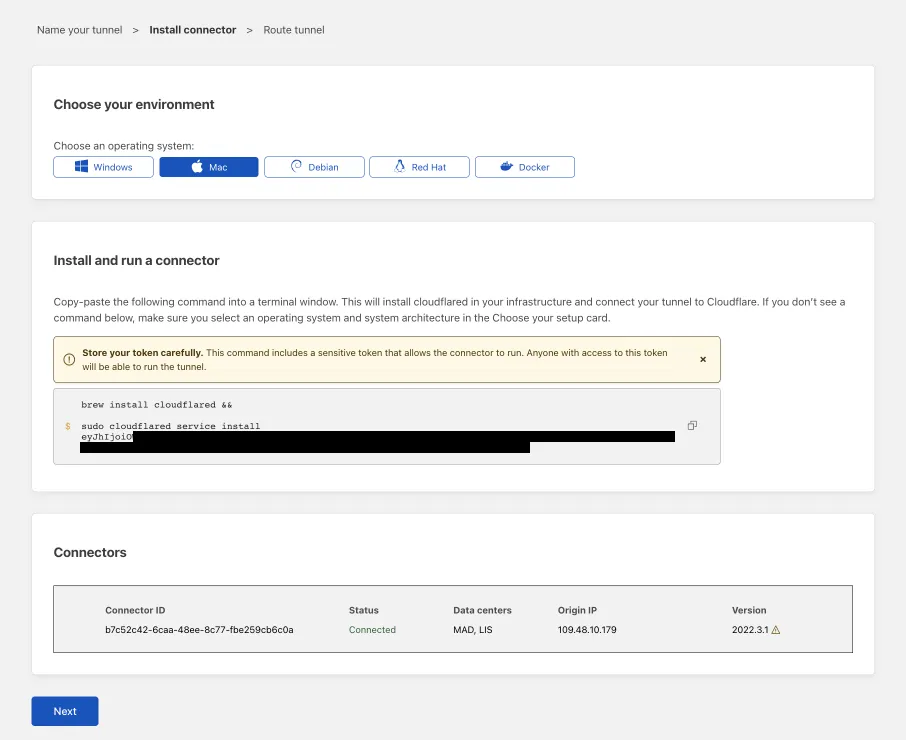
-
Select Next.
Add private network routes
Section titled “Add private network routes”-
In the Private Networks tab, add the following IP addresses:
- Private IP/CIDR of your application server (for example,
10.128.0.175/32) - Private IP/CIDR of your DNS server
- Private IP/CIDR of your application server (for example,
-
Select Save tunnel.
The application and DNS server are now connected to Cloudflare.
Enable Clientless Web Isolation
Section titled “Enable Clientless Web Isolation”- In Zero Trust ↗, go to Settings > Browser Isolation.
- Enable Clientless Web Isolation.
-
For Permissions, select Manage.
-
Select Add a rule.
-
Create an expression that defines who can open the Clientless Web Isolation browser. For example,
Rule action Rule type Selector Value Action Allow Include Emails ending in @example.comSelect Save.
To test, open a browser and go to https://<team-name>.cloudflareaccess.com/browser/https://<private-IP-of-application>.
Create a Gateway resolver policy
Section titled “Create a Gateway resolver policy”-
Go to Gateway > Resolver policies.
-
Select Add a policy.
-
Create an expression to match against the private domain or hostname of the application:
Selector Operator Value Domain in internalrecord.com -
In Select DNS resolver, select Configure custom DNS resolvers.
-
Enter the private IP address of your DNS server.
-
In the dropdown menu, select
<IP-address> - Private. -
(Optional) Enter a custom port.
-
Select Create policy.
To test, open a browser and go to https://<team-name>.cloudflareaccess.com/browser/https://internalrecord.com.
Create a Gateway network policy (recommended)
Section titled “Create a Gateway network policy (recommended)”-
Go to Gateway > Firewall policies > Network.
-
Add a network policy that targets the private IP address of your application. You can optionally include any ports or protocols relevant for application access. For example,
Selector Operator Value Logic Action Destination IP in 10.128.0.175And Allow Destination Port in 80Or User Email matches regex .*example.com
For best practices on securing private applications, refer to Build secure access policies.
Connect as a user
Section titled “Connect as a user”Users can now access the application at the following URL:
https://<team-name>.cloudflareaccess.com/browser/https://internalrecord.com
The application will load in an isolated browser. You can optionally configure remote browser controls such as disabling copy/paste, printing, or keyboard input.
Was this helpful?
- Resources
- API
- New to Cloudflare?
- Products
- Sponsorships
- Open Source
- Support
- Help Center
- System Status
- Compliance
- GDPR
- Company
- cloudflare.com
- Our team
- Careers
- 2025 Cloudflare, Inc.
- Privacy Policy
- Terms of Use
- Report Security Issues
- Trademark