Office 365 journaling setup
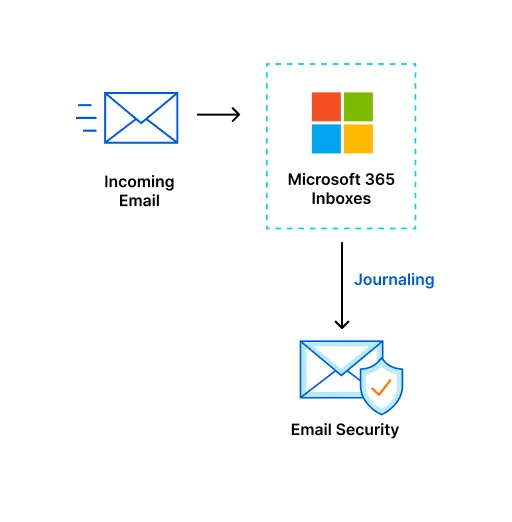
When you receive an email, the email lands on your Microsoft O365 inbox, and then Email Security receives a copy of that email. The following email flow shows how this works:
To enable Microsoft 365 journaling deployment:
- Log in to Zero Trust ↗.
- Select Zero Trust.
- Select Email Security.
- Select Monitoring: If you have not purchased Email Security, select Contact Sales. Otherwise, select Connect a domain.
- Select BCC/Journaling.
- Select Integrate with MS > Authorize.
Integrate with Microsoft O365
Section titled “Integrate with Microsoft O365”To integrate with Microsoft O365:
- Name integration: Add your integration name, then select Continue.
- Authorize integration:
- Select Authorize. Selecting Authorize will take you to the Microsoft Sign in page where you will have to enter your email address.
- Once you enter your email address, select Next.
- After selecting Next, the dashboard will show you a dialog box with a list of requested permissions. Select Accept to authorize Email Security. Upon authorization, you will be redirected to a page where you can review details and enroll the integration.
- Review details: Review your integration details, then:
- Select Complete Email Security set up where you will be able to connect your domains and configure auto-moves.
- Select Continue to Email Security.
Continue with Connect your domains for the next steps.
Connect your domains
Section titled “Connect your domains”On the Set up Email Security page:
- Connect domains: Select at least one domain. Then, select Continue.
- (Optional) Add manual domains: Select Add domain name to manually enter additional domains. Then, select Continue.
- (Optional) Adjust hop count: Enter the number of hops. Then, select Continue.
- (Optional, select Skip for now to skip this step) Move messages: Refer to Auto-moves to configure auto-moves. Then, select Continue.
- Configure service address with your third party email provider: Copy and paste the service address into your third-party email provider to allow BCC/Journaling:
<account tag>@CF-emailsecurity.com. - Review details: Review your connected domains. Then, select Go to domains.
Your domains are now added successfully.
To view your connected domains:
- Go to Settings.
- Locate your domain, select the three dots > View domain. Selecting View domain will display information about your domain.
Next steps
Section titled “Next steps”Enable logs to send detection data to an endpoint of your choice.
Was this helpful?
- Resources
- API
- New to Cloudflare?
- Products
- Sponsorships
- Open Source
- Support
- Help Center
- System Status
- Compliance
- GDPR
- Company
- cloudflare.com
- Our team
- Careers
- 2025 Cloudflare, Inc.
- Privacy Policy
- Terms of Use
- Report Security Issues
- Trademark